Ever wanted your Arduino to detect a 12V signal—like from industrial equipment or machinery? You can’t connect 12V directly; it would instantly fry the board. But there’s a super easy and cheap fix: use just two resistors to step the voltage down safely!
The Simple Trick: Voltage Divider
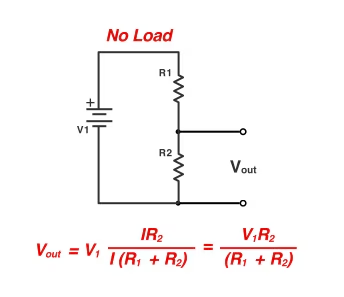
Below you’ll see a simple wiring diagram (see the image). The magic is in the resistors:
- R1 goes between your 12V signal and the Arduino pin.
- R2 goes from the Arduino pin to ground.
That’s it! With the right resistor values, this setup will safely drop the 12V down to a level the Arduino can handle (5V or 3.3V, depending on your board).
How Does It Work?
Think of R1 as a “gatekeeper” that limits how much voltage reaches your Arduino pin. R2 then acts as a “bridge” to ground, further reducing the voltage to the perfect level for your Arduino.
The values of R1 and R2 are what determine how much the voltage is reduced. For example:
- If you use R1 = 680kΩ and R2 = 470kΩ:
- Your 12V signal will get knocked down to just about 5V at the Arduino pin—safe and sound!
- If you use R1 = 680kΩ and R2 = 220kΩ:
- Your 12V signal will get knocked down to just about 3V at the Arduino pin—safe and sound!
Why This Works
- No fancy parts needed: Just two cheap resistors you probably already have.
- Quick and reliable: Works for both digital (HIGH/LOW) and analog signals.
- Tiny and easy: Takes almost no space on your breadboard or PCB.
Important Tips
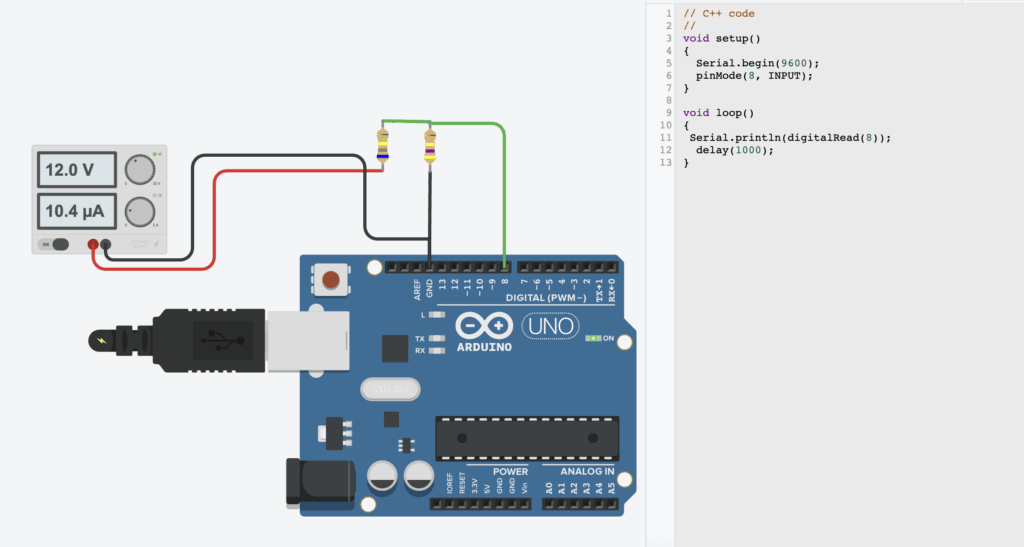
- Always double-check the voltage at the Arduino pin with a multimeter before plugging it in, just to be safe!
- If you want extra protection, you can add a small 5V Zener diode from the Arduino pin to ground. This will clamp the voltage if it ever tries to go above 5V.
Summary
With just R1 and R2 as shown in the image, you can connect high-voltage (12V) signals to your Arduino and keep your project safe. This little trick is a lifesaver for anyone mixing Arduino with bigger equipment!